|
|
Bhut Jolokia Seeds For Sale |
Buy Now |
|
These Bhut Jolokia Seeds were
harvested in 2009. These plants were grown in all natural conditions with no
chemicals in total isolation
from other peppers to insure absolute genetic purity.
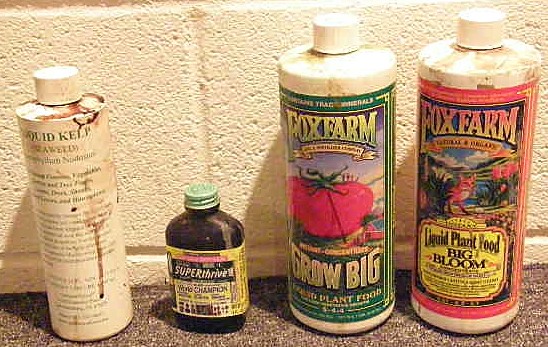
All of our peppers were grown in pots with
Fox Farm Ocean Forest soil and
fertilizers with filtered water.
Bhut Jolokia seeds are difficult to
grow and is not recommended for the novice gardener. When starting
your seeds indoors, soil temperature must be 80 to 90 degrees. Plant in a
good rich organic well drained growing medium. The seeds can take up to 36
days just to germinate and 160 days before harvesting. It is the warmth
rather than sun light that causes seed to germinate. Sow your Bhut seeds
8-10 weeks indoors before it is safe to plant in the garden. After plants
sprout, keep under lights (CFL - T5 - Florescent) for up to 18 hours a day
until ready to set outdoors. Keep soil moist and never allow it to dry out
and never allow it to become soggy. Temper plants before planting outside.
Keep in full sun. Chiles like a rich, well drained growing medium. This
type pepper does not seem to set fruit well. Flower drop can be caused by
- Air temperature of over 95 deg - Too much nitrogen, or even small
amounts of stress. Try to avoid transplanting more than once.
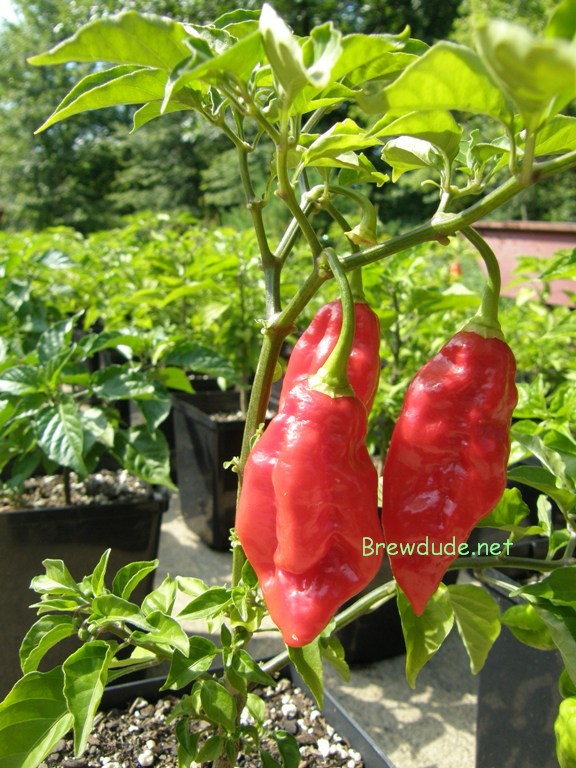
This is such a potent Chile that one
seed can cause intense pain for up to 30 minutes! Extreme care should be
taken with the pepper, especially to avoid the eyes, as it can cause
severe burns. The official Scoville heat rating is 1,041,427 SHU (Scoville
Heat Unit). Wear rubber gloves and safety glasses when processing. Even
the seeds can burn when handling them! Scroll
down for some recipes and my 2010 grow log
|
|
RECIPES |
| Fire Salsa |
Ghost Chile
Oil |
1/2 ounce stemmed, dried bhut
jolokia chilies (or fresh)
2 cloves garlic
1 tablespoon white vinegar
1 (15-ounce) can diced tomatoes with juice
Salt |
Ingredients: In a bowl, add dried chilies, and cover with hot water.
Re-hydrate for 15 minutes. In a blender, combine chilies and 1/3 cup
soaking water, and then add garlic and vinegar; purée. In a bowl, add
chili purée to tomatoes, and combine.
|
3/4 cup extra-virgin olive oil
2 1/4 cups canola oil
3 dried bhut jolokia chilies, cut in half lengthwise |
Procedure: Preheat the oven to 225ºF. In an
oven-safe dish, add oils and chilies. Cover with aluminum foil, and bake
for 3 hours. Remove from oven, transfer to airtight container, and place
in refrigerator to cool. For added heat, leave pepper in the oil. Store in
refrigerator for up to 1 month. |
|
2010 BHUT JOLOKIA JOURNAL
Click on Picture for a bigger view in a new
window |
|
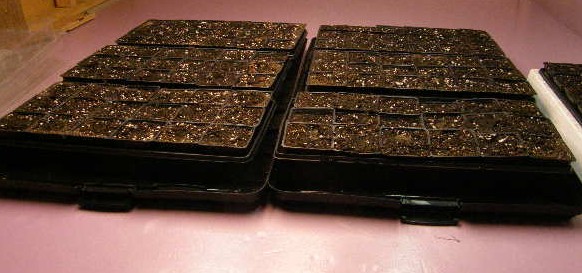
Start (January
31) |
 |
We started
our crop a little later this year, (end of January instead of end of
December) so the plants would not get to big before they get transferred
to bigger pots and put outside (end of May Zone 5). The seeds used are
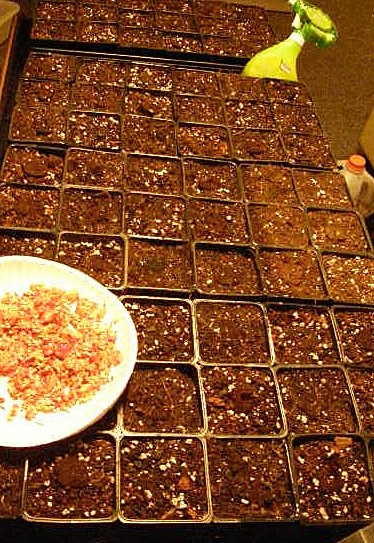
randomly selected from the same batch that is shipped to you. I am setting 18 - 3x3
pots/cells per tray. Each starter cell is filled with Fox Farms
Ocean Forest growing medium and a starter plug/cube. I use Rapid
Rooter starter plugs and/or Rockwool cubes. Be sure to soak the cubes for
24 hours before use. We use plugs/cubes because they give the plant more
support as they grow and hold moisture for germination. The solution
that is used to soak the cubes as well as what is used to mist the seeds
is made up of a variety of sources. In a gallon of filtered water, Fox
Farms 'Grow
Big', and 'Big
Bloom' is mixed with Garden's Alive Liquid Kelp and a few drops of
Super Thrive. After the pots are filled and plugged/cubed, they are
drenched with the nutrient solution. Next the seed is placed into the hole
and a light layer of soil is sprinkled on top. The seeds are then misted
again. A spray mist is used so that the seeds do not float away. They will
be kept moist at 75˚F - 80˚F. Seven trays of 126 plants will be started this
year. |
 |
|
Day 7 (February
7) |
 |
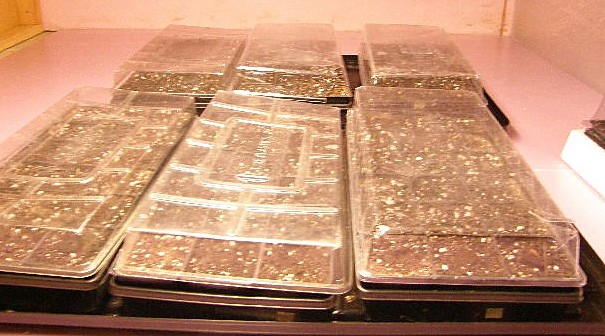
Trays are kept moist and sprayed with the same mix
that was originally used for cube soaking and spray. This Plant Juice
mix will be used until flowering time. The trays have been covered to
conserve moisture and lightly sprayed every morning. A single florescent
tube is used for light and set for 18 hours. Light is not that important
now because it has no effect on germination, but I like to keep one on in
case any seeds get started. Temperature is kept at about 80˚F. Surprising
to me... Some activity is happening already. Last year I did not get a
single sprout until over two weeks of watering dirt. Using the covers
seems to help keep humidity levels higher. There was some condensation on
them. I did not use them last year. |
 |
|
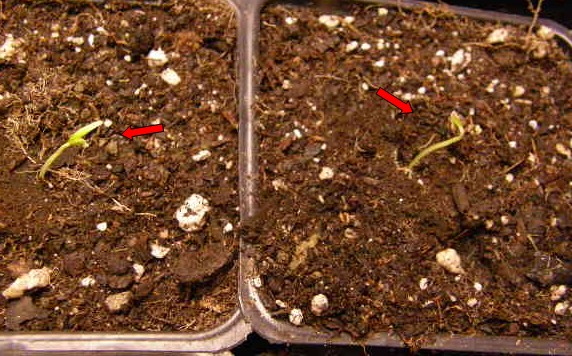
Day 14 (February
14) |
|
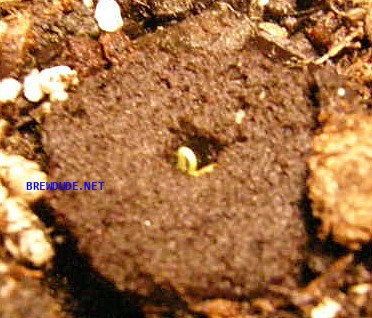
Sprouts are beginning to start poking out! There
are about 8 - 12 per tray with more to come. Since the spout ratio
is greater, the lids will be removed. Four foot florescent tubes are
used for light. I use one plant/aquarium (bluish spectrum) and one
natural sunlight (more of the orange/red spectrum) tube in an 'el
cheap-o' fixture. The lights are turned on (with a timer) for
18 hours a day and lowered to about 12" above the sprouts. No need
for fancy metal halide - you just want to give the plants enough of
the spectrum until they go to hardening off for outside (unless you
have a set-up that is indoor for the complete cycle of the plant).
By next week I will see which cells are sprouting and which are not.
I will combine all of the seedlings and then re-seed the cubes/plugs
that did not sprout. I water/mist seedlings
daily. |
|
|
 |
 |
 |
|
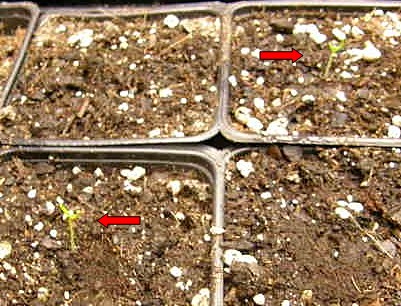
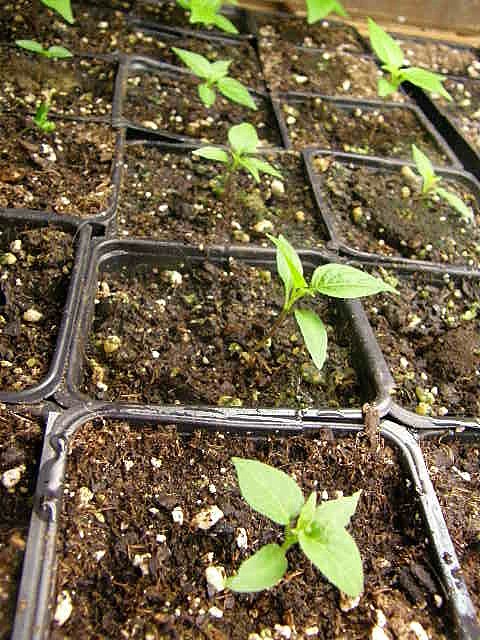
Day 21 (February 21) |
|
 |
Growing is in full swing right now. I seem to be getting about 13- 15
seedlings per tray for roughly 80% germination rate. I separated the
seedlings from the non-sprouts and will give those another week to show
some progress. If nothing comes up by the end of the week I will reseed
those cells. A few seedlings are beginning to show the first set of true
leaves (after the Cotyledon). The height is a bit over an inch. |
 |
|
Week 5 |
 |
The plants are looking great. I
had a few die off for some reason. I reseeded those cells. I also reseeded
the other cells that did not show any activity. I did have a few pop up
eventually. The watering schedule is the same and the lights are on for 18
hours still. |
 |
|
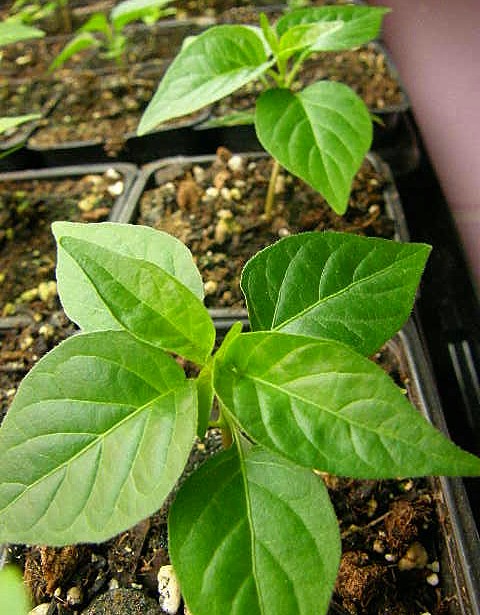
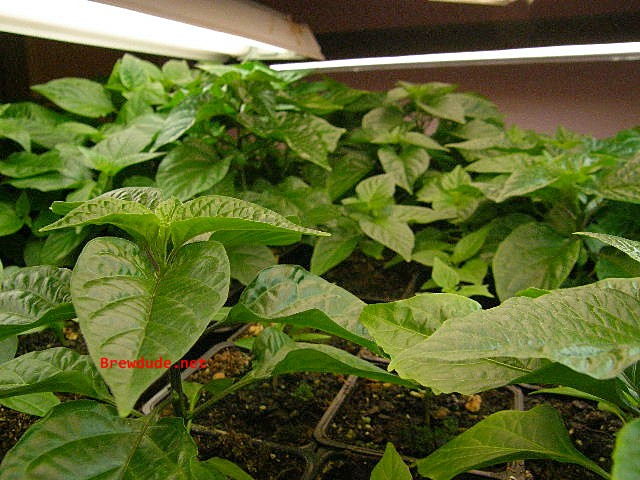
Week 6 |
 A lot of the reseeded cells
are now beginning to sprout. The peppers will be rearranged so that the
bigger ones do not block out the smaller ones. Now it is a matter of
giving them the best care until we are ready to transfer them into a
bigger pot. The peppers vary from about 2.5 inches to seedlings in size.
A lot of the reseeded cells
are now beginning to sprout. The peppers will be rearranged so that the
bigger ones do not block out the smaller ones. Now it is a matter of
giving them the best care until we are ready to transfer them into a
bigger pot. The peppers vary from about 2.5 inches to seedlings in size. |
|
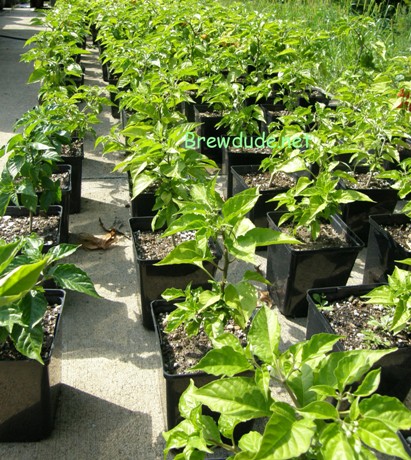
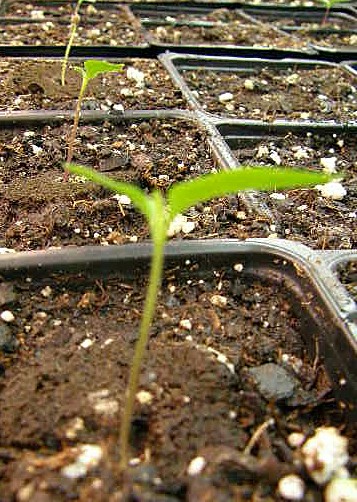
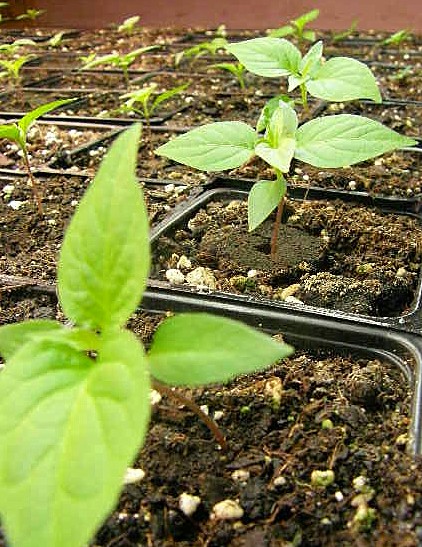
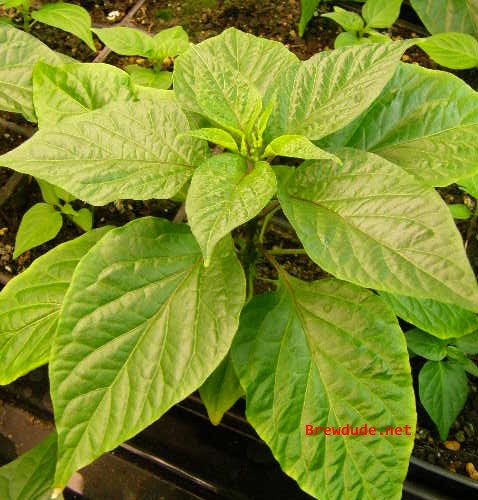
Week 7 |
 |
As you can see in the photo, a
few of them are really taking off! A mix of the same juice I use for
watering will be slowly used as a foliar spray on some of the bigger (four
true leaves) plants. |
 |
|
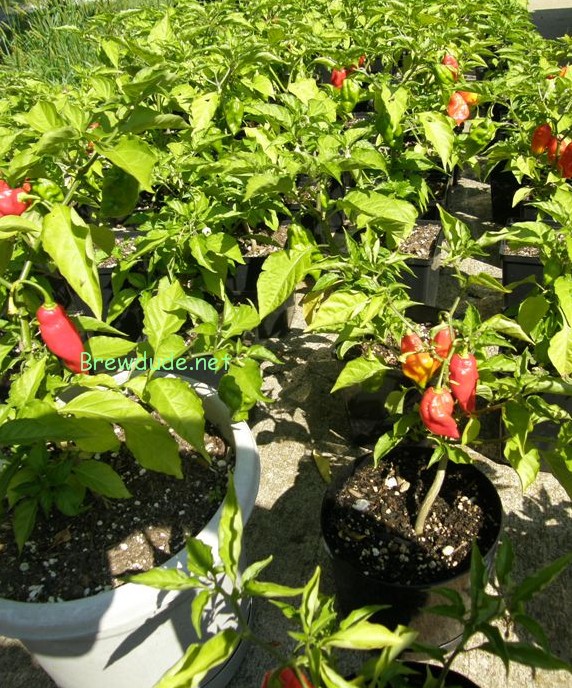
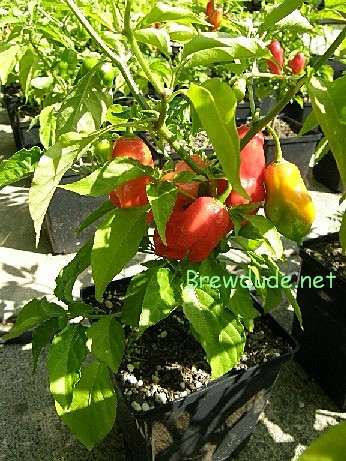
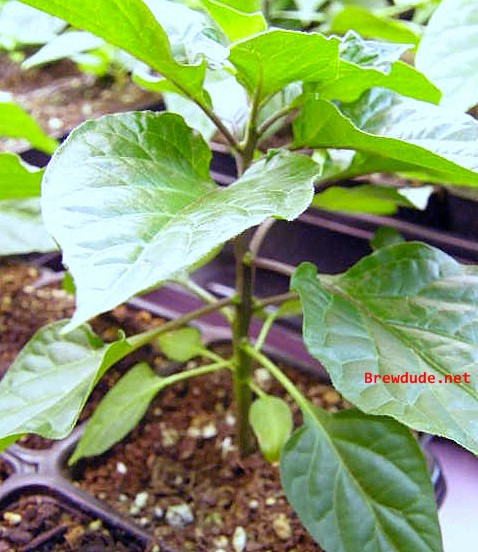
Week 12 |
|
|
|
|
Long overdue for an update. I
have been taking advantage of the record breaking weather to work on a
hoop house in the garden. Check back in a few months to see how I did it!
Back to the BHUTs - As you can see from the photos, the majority of
peppers are ready for transplant. That will be the next update. Next year
I will wait until March 1 to plant. I have been using the same
watering mix for the plants. There have been times I used just filtered
water during the weeks past as well as missed watering altogether. Once
the seedlings have their second set of true leaves, they will be able to
survive. I would say the average size is about 5-6 inches now. A few are
over 8 inches. Things are looking good, accept my last frost date is May
15. I will now make room and add lights for transplants. |
|
 |
 |
 |
|
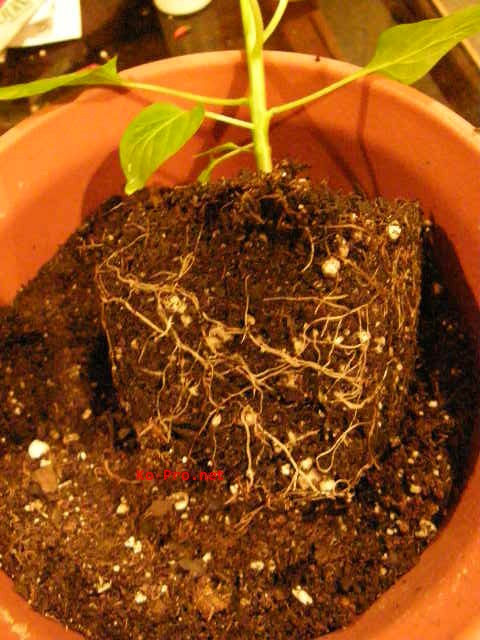
Week 13 |
|
|
 |
I took the first 10 of the
biggest plants out and started transplanting. These will be the final pot
for these plants. A few may be put in larger pots to see how big I can get
it to grow. I am using a mix of Fox Farms
Ocean Forest growing medium and left over soil that came from the pots
of the last crop. This soil has been conditioning in bins in the shed with
added endo - and ectomycorrhizal fungi and
beneficial
microorganisms. The spores were added one week prior to use. They promote
fast plant and root growth, increase nutrient and water uptake and reduce
fertilizer use (This is the stuff to use for the super pumpkins!). A few
plants have hit the 10 inch mark. I will keep these plants under florescent lights until it is time to go
outside. |
 |
|
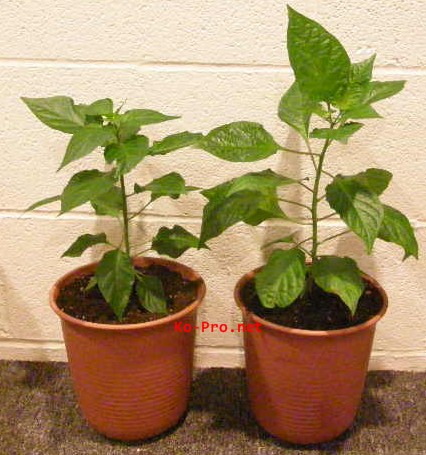
Week 14 (May 2) |
|
|
 |
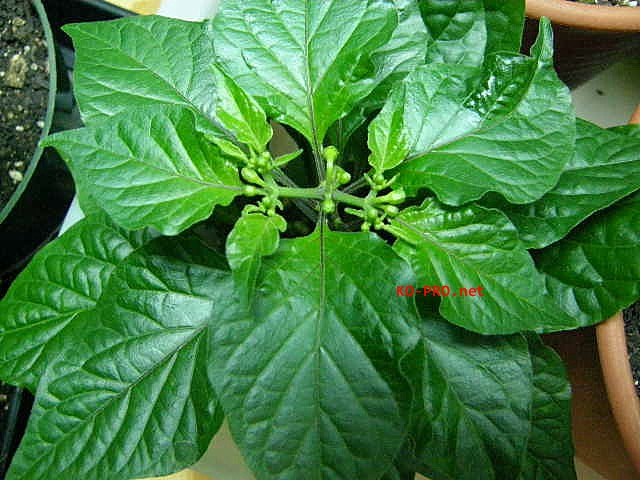
These
peppers must like these conditions... a few of them are getting ready to
send out the first set of flowers! I have been busy transplanting this
past week. Only about a hundred more to go! |
 |
|
Week 17 |
|
|
|
|
The weather is finally turning
into summer and last week I started to bring out the flowering peppers.
Just as long as night temps stay above 60 degrees, you should be OK.
Whatever you do, do not bring out your plants and put them in full sun
right away. They will bend over and wilt. I have mine on the north side of
the garage in the shade. Plants spent a week in the shade and then get put
into the sun. Slowly get them used to the outdoors and you will not have
flower drop and leaf drop. |
|
|
|
|
|
|